Estimated read time: 7-8 minutes
This archived news story is available only for your personal, non-commercial use. Information in the story may be outdated or superseded by additional information. Reading or replaying the story in its archived form does not constitute a republication of the story.
Editor's note:The contents of this article are for informational purposes only. The content is not intended to be a substitute for professional advice. The owner and operator of this site do not recommend or endorse any specific products, procedures, opinions, or other information that may be mentioned in the article. Reliance on any information provided by the site owner and operator, is solely at your own risk. Always make sure you have the proper equipment, physical condition and experience level before trying any outdoor activity. And be sure to always check the weather conditions before traveling into any canyon.- - - - - -
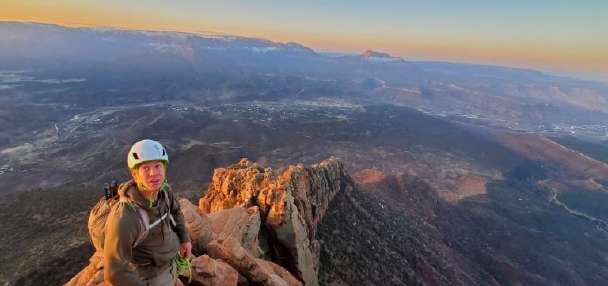
SALT LAKE CITY — Canyoneering, as defined, is a sport in which adventurers explore a canyon by engaging in hiking, climbing, scrambling, swimming, jumping, and rappelling. It typically involves some technical ropework, route-finding, and other advanced skills. The risks associated with canyoneering aren’t to be taken lightly. One should always research their route in advance, look at weather conditions and recent trip reports, have adequate training in rope work, rescue work, anchor building techniques, and be able to lead their team through their desired route safely.
Despite a somewhat steep learning curve, your skills will develop and there will always be bigger/more technical canyons where you can continue to push yourself and your abilities. To begin descending canyons, the level of entry is relatively attainable. Let's go over some of the basics to get you started.

Canyon rating system
When you start researching canyons you want to descend, it’s important to know the lingo so you don’t go and bite off more than you can chew. Due to changing conditions and the variety of terrain, the canyon rating system is very flexible. Here’s a basic intro:
Canyon rating systems begin with a number (1-4), which refer to the terrain and technical ropework involved.
- “1-2” are easily hiked through. The canyons may include of a few short downclimbs, but no rappels.
- "3" canyons require technical skill/knowledge/gear (anchor building, rappelling and/or ascending).
- "4" canyons include extra challenges, usually consisting of rappels of 300+ feet, deep potholes that require tools and skills to escape, unusual exposure, or difficult anchor challenges.
- "A" is dry, or very little water (mostly avoidable). Shoes may get wet.
- "B" has water with no current, still pools. Waterfalls are dry/trickle. Deep wading/swimming. Pack a wetsuit.
- "C" has water with a current. Waterfalls are flowing (increased risk). Deep wading/swimming in a current. Wetsuit.
- "PG/R/X" canyon with extraordinary risk factors, not for beginners. Errors lead to injury/death.
- I: Short. Normally only requires a couple hours.
- II: Half day. 3-5 hours.
- III: Full day. 6-9 hours.
- IV: Long day. Beyond sunrise/sunset.
Essential gear
The hope is that anyone getting into the sport will have gone with somebody a time or two beforehand. Once you have done that, there are plenty of resources online (or at local shops) to buy the gear prior to heading out for your first trip. A little research and experience can go a long way.
Here's what you'll need:
- Harness: Climbing harnesses are satisfactory for canyoneering. You'll want a non-absorbent, hard wearing fabric and reinforced gear loops.
- Locking Carabiner (x2): Used to clip in your rappel device to your belay loop on your harness. Bring an extra for your personal anchor system.
- Rappel device: Lots of climbers who jump into canyoneering use their ATC, but a figure 8 or special descending device is recommended. Consider the weight of the person, friction settings while on rappel, being able to lock-off while on rappel, and not having to remove the device when you come off rappel. Examples are the Sterling ATS, or the Critr2.

1. Helmet: The rule of thumb is safety first. With canyoneering, it’s not uncommon for small rocks to tumble down. 2. PAS: Personal Anchor System. Attached to your harness (girth hitch) and clipped into anchors with your extra carabiner. 3. Rope & webbing: Yeah, that’s important too. Pick up 50’ of tubular webbing and 4-5 8mm quick links. More rope info below. What ropes work best?
Leave your dynamic climbing ropes at home. Sure, they will work, but they will get destroyed quickly. When you get into canyoneering, it’s important to pick up some canyoneering specific STATIC rope. These are more abrasion resistant, do not bounce and load anchors, typically have some water repellent in them, and are least likely to cut over sharp edges.
There are a variety of brands that carry canyon specific ropes, all with different feels, thickness, etc. They range in diameter from 8mm to 11mm, with the thicker ropes generally being stronger, heavier, less stretchy, abrade less easily, and are safer for beginners.
The Sterling Canyon series ropes (9.0mm C-IV, 9.0mm HTP, and 8.5mm Canyon Prime are nice options to get you started), as well as the Imlay Canyoneering Gear 8.3mm Canyon Fire or the 9.2mm Canyonero (all varying in cost, thickness, and durability).
A good length to get when you’re starting out is a 200-foot strand, thus allowing you to do rappels up to 100 feet (since you’ll need the other half to retrieve your rope. More on that process later). A 9.0mm rope is a great place to start with your first rope.

Where do I go?
Utah has many amazing places to explore. If you’re in northern Utah, there are places right here in our backyard where you can practice your rigging and technique.
Know your knots
Spend some time to go over your knots and rigging at home before you head out to a canyon. Be knowledgeable about inspecting anchors/webbing, and know how to replace them if needed. Familiarize yourself with the following:
1. Clove hitch/Static block (to block the rope against a quick link using a carabiner once rappel length is set). 2. Figure 8/Contingency block (to block the rope against a quick link using a figure 8 device once rappel length is set). 3. Inline Figure 8 knot (joining two ropes together, to pull your rope). 4. Double Overhand knot (joining two ropes together, to pull your rope). 5. Water knot (essential for tying your webbing together when building anchors). 6. Figure 8 on a bight (for safety/belay situations).
Leadership/fireman belay
Each team that descends into a slot canyon should consist of at least two competent canyoneers, one to be the first person to descend and the other to bring up the rear (assisting all others on the rope). The first person down should perform a fireman belay from below, thus being able to slow down someone mid-rappel (if needed). Practice good communication techniques between the person rappelling and the fireman belay so that they are both aware and ready.
Maps & GPS
Be sure to have the route description and map saved onto your phone, or if you prefer to be more thorough (and old school), print them off. If using a mapping system on your phone (like GAIA or something similar), you can record your tracks and often times plot out your route or import coordinates from online databases. Doing this will make your experience much more enjoyable and straightforward. This is always a must!
Lastly, when planning for your canyoneering trips, make sure everybody in your group is capable of completing the canyon and in proper conditioning to do so. Your team is only as strong as your weakest link, so be mindful of the type on conditions you put team members in. If someone gets injured or isn’t prepared to enter a canyon, that impact will be felt by the entire group (thus turning a quick outing into an unplanned all day survival fest).
Be smart. Work as a team in helping people to downclimb when needed, and assist one another to have a pleasant and safe experience.
Note: Josh Allen is an expert in canyoneering and compiled this article from his own expertise and experience as well as accumulated knowledge.Josh Allen is Southern California native, but is proud to call Utah home. Website: rawtrails.com, Email: rawtrails@yahoo.com